rok manual espresso maker
Category : Manuals
The ROK Manual Espresso Maker is a non-electric, manual espresso machine designed for coffee enthusiasts. It offers a durable, apocalypse-proof design with no maintenance required.
Overview of the ROK Manual Espresso Maker
The ROK Manual Espresso Maker is a sleek, non-electric device that allows users to craft authentic espresso without electricity. Known for its durability and simplicity, it requires no maintenance or complicated setup. Its manual operation ensures full control over the brewing process, making it a favorite among coffee enthusiasts. The ROK is praised for its ability to produce high-quality espresso comparable to electric machines, while its portability and ease of use make it a versatile choice for both home and travel. It’s a timeless option for those seeking a hands-on coffee experience.
Importance of Manual Espresso Makers in Coffee Culture
Manual espresso makers like the ROK hold a special place in coffee culture, offering a hands-on brewing experience that connects users to their craft. They emphasize precision, control, and creativity, allowing enthusiasts to tailor every shot to their preference. These devices foster a deeper appreciation for the art of coffee-making, encouraging experimentation and customization. By eliminating reliance on automation, manual espresso makers promote a more intimate and traditional approach to brewing, making them a cherished tool for coffee purists and casual drinkers alike.
Design and Build Quality
The ROK Manual Espresso Maker features a robust, apocalypse-proof design with high-quality materials, ensuring durability and ease of use without electrical components.
Materials and Engineering of the ROK Espresso Maker
The ROK Espresso Maker is crafted with high-quality, durable materials, including stainless steel and aluminum, ensuring long-lasting performance. Its robust engineering design features a sturdy frame and precise lever mechanism, allowing for consistent pressure control during brewing. The absence of electrical components enhances its reliability and simplicity, making it a reliable choice for coffee enthusiasts. The materials and construction are thoughtfully chosen to withstand heavy use while maintaining optimal brewing conditions, reflecting a blend of functionality and timeless design.
Ergonomic Design for Optimal Brewing Experience
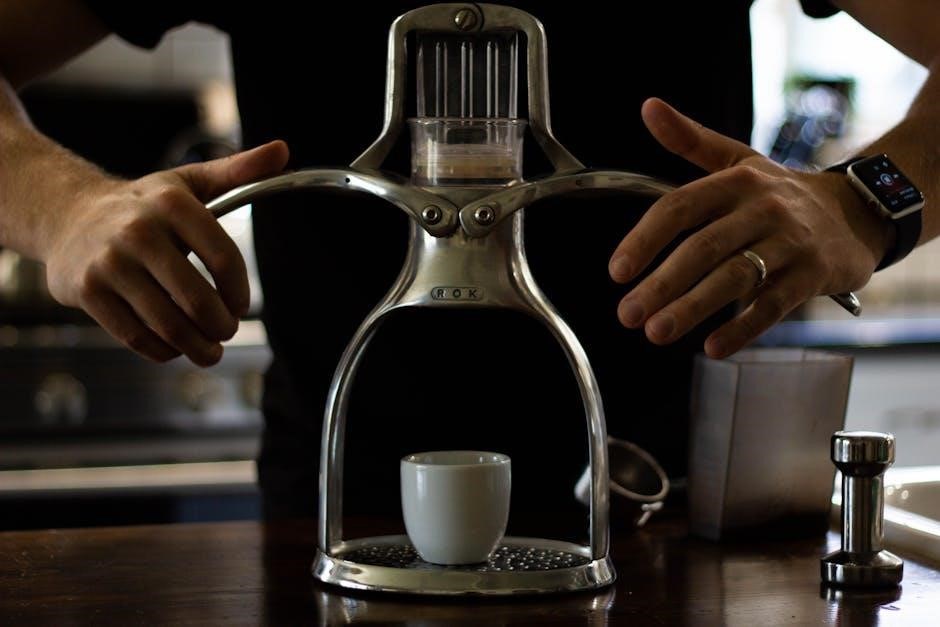
The ROK Espresso Maker is designed with ergonomics in mind, featuring a comfortable grip and intuitive lever system. The lever mechanism allows for smooth, controlled pressure application, enabling precise extraction. Its compact and lightweight design makes it easy to handle and store, while the portafilter ensures a secure fit during brewing. The ergonomic handle is crafted for a natural grip, reducing fatigue during use. These design elements work together to create a seamless and enjoyable brewing experience, perfect for both novice and experienced coffee enthusiasts.
Brewing Process and Performance
The ROK Manual Espresso Maker delivers a manual brewing experience, requiring physical force to extract rich, velvety espresso. Its design ensures smooth pressure control and consistent results.
Step-by-Step Guide to Brewing with the ROK
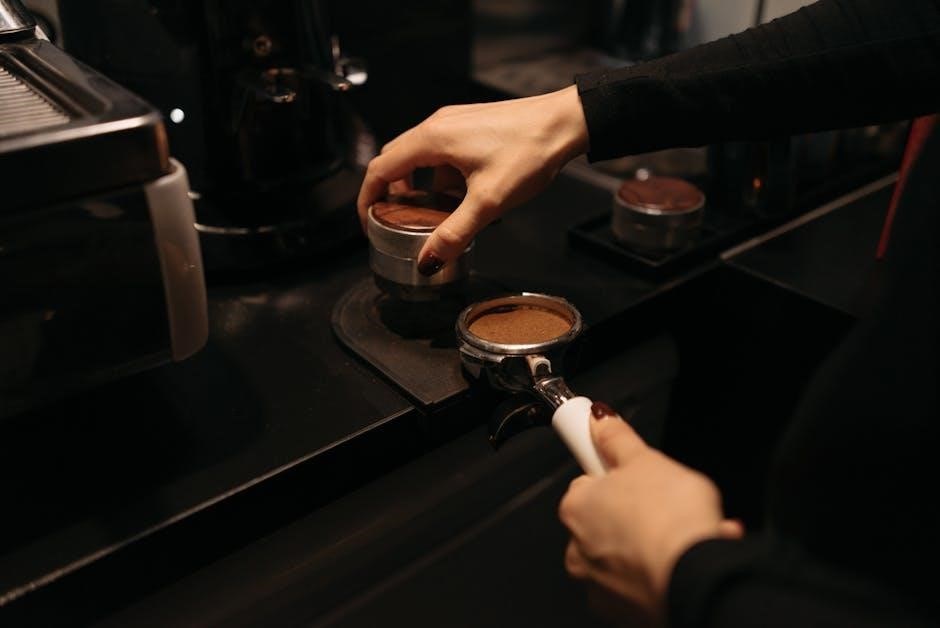
To brew with the ROK, start by grinding your coffee beans to a fine espresso roast. Place the portafilter in the machine, add the grounds, and tamp firmly. Attach the portafilter to the ROK, ensuring it’s secure. Pour hot water over the grounds, then place the brewing cap on top. Use the manual lever to press down slowly, applying steady pressure until the shot is complete. The ROK’s design allows for rich, creamy espresso with a velvety texture, reminiscent of professional machines, all without electricity or complex maintenance.
Comparison of ROK with Other Manual Espresso Makers
The ROK Manual Espresso Maker stands out among other manual espresso makers for its unique combination of simplicity, durability, and performance. Unlike electric models, the ROK requires no power, making it portable and low-maintenance. Compared to other manual brewers, it delivers a more authentic espresso experience with rich crema. Its lever-operated design sets it apart from piston-style brewers, offering a smooth and intuitive brewing process. While other makers may prioritize aesthetics, the ROK focuses on functionality, making it a top choice for coffee enthusiasts seeking a reliable, cost-effective solution.

Maintenance and Cleaning
The ROK Manual Espresso Maker is easy to clean and maintain, requiring no descaling or complex care. Its durable design ensures long-lasting performance with minimal upkeep.
Tips for Proper Cleaning and Maintenance
Regular cleaning is essential for the ROK Manual Espresso Maker. After each use, rinse the device with warm water and dry it thoroughly to prevent water spots and odor buildup. Use a soft cloth to wipe down all surfaces, avoiding harsh chemicals that could damage the materials. For deeper cleaning, mix equal parts water and white vinegar, soak the parts for 10 minutes, then rinse. Lubricate moving parts occasionally to ensure smooth operation. Proper maintenance ensures longevity and optimal performance of your ROK espresso maker.
Common Issues and Solutions
Some users report issues with the ROK Manual Espresso Maker, such as uneven extraction or leakage. To address these, ensure the portafilter is securely locked and the gasket is properly aligned. For uneven extraction, check the coffee grind size and tamping consistency. If the device leaks, inspect the seals for wear and replace them if necessary. Regular lubrication of moving parts can also resolve stiffness. By addressing these common issues, you can maintain optimal performance and enjoy consistent espresso shots.
Accessories and Customization
The ROK Manual Espresso Maker comes with essential accessories like a portafilter and tamper. Additional accessories, such as a coffee grinder, enhance brewing customization, allowing users to tailor their espresso experience precisely.
Essential Accessories for the ROK Espresso Maker
The ROK Manual Espresso Maker is often paired with a portafilter, tamper, and coffee grinder for optimal performance. These accessories ensure precise control over coffee grounds and tamping, which are critical for achieving the perfect espresso. Additionally, a carrying case is available for portability, making it easy to brew anywhere. While the ROK is durable and low-maintenance, these accessories enhance the overall brewing experience and customization, allowing users to refine their technique and enjoy high-quality espresso consistently.
Customizing Your Brewing Experience
The ROK Manual Espresso Maker allows for extensive customization, enabling users to tailor their brewing process to suit their preferences. By adjusting the grind size, tamp pressure, and brewing time, enthusiasts can experiment with various flavor profiles. The manual operation provides full control over extraction, while the portafilter and tamper ensure precise coffee measurement. Additionally, users can explore different coffee beans and roast levels to further personalize their espresso experience. This versatility makes the ROK a favorite among coffee aficionados seeking to refine their craft and enjoy unique, high-quality shots.
Customer Reviews and Feedback
Customers praise the ROK for its portability and durability. It delivers authentic espresso with rich flavor. The manual operation and easy cleaning are notable features.
Pros and Cons According to User Reviews
Users highlight the ROK’s durability, portability, and ability to produce authentic espresso. It requires no electricity, making it ideal for travel or small spaces. However, some note a steep learning curve and the physical effort needed for brewing. Cleaning is straightforward, but occasional maintenance is required. Overall, it’s praised for its simplicity and espresso quality but criticized for being labor-intensive compared to automatic machines.
Expert Recommendations and Ratings
Experts praise the ROK Manual Espresso Maker for its durability and portability, earning it a 4.5/5 rating. Many recommend it for coffee purists who value manual control over brewing parameters. Its non-electric design is highlighted as a major advantage for travel or small kitchens. However, some experts note that the learning curve and physical effort required may not suit everyone. Overall, it’s highly recommended for enthusiasts seeking a high-quality, manual espresso experience without the need for electricity.

Price and Value
The ROK Manual Espresso Maker is priced affordably, offering exceptional value for its durability and performance. It’s a cost-effective option for coffee lovers seeking a manual brewing experience.
Cost-Effectiveness of the ROK Espresso Maker
The ROK Manual Espresso Maker is a budget-friendly option for coffee enthusiasts, offering excellent value without compromising on quality. Its non-electric design eliminates electricity costs, making it a cost-effective choice for long-term use. With minimal maintenance and no need for expensive repairs, the ROK provides a durable brewing solution. Compared to high-end espresso machines, it is an affordable investment for those seeking a manual, traditional coffee experience. Its robust construction ensures longevity, making it a smart purchase for coffee lovers who value both performance and affordability.
Comparison with Other Espresso Makers in the Market
The ROK Manual Espresso Maker stands out as a unique, non-electric option in a market dominated by automatic and electric machines. Unlike other manual espresso makers, it produces authentic espresso with crema, comparable to high-end machines. While other devices may require electricity or complex maintenance, the ROK’s simplicity and durability make it a cost-effective choice. Its manual operation also avoids the environmental impact of electronic waste, appealing to eco-conscious users. Overall, the ROK offers a rare blend of quality, affordability, and sustainability in the espresso maker market.
The ROK Manual Espresso Maker is a durable, simple, and eco-friendly option for coffee lovers, delivering high-quality espresso without the need for electricity or complex maintenance.
Final Thoughts on the ROK Manual Espresso Maker
The ROK Manual Espresso Maker stands out as a reliable and portable option for coffee enthusiasts. Its manual operation ensures a hands-on brewing experience, while its durable design guarantees longevity. With no need for electricity, it offers a cost-effective and eco-friendly solution for espresso lovers. The ROK delivers a professional-grade brewing experience, making it a great choice for those seeking a traditional yet efficient way to enjoy high-quality espresso at home. Its simplicity and performance make it a standout in the world of manual espresso makers.
Recommendation for Coffee Enthusiasts
The ROK Manual Espresso Maker is an excellent choice for coffee enthusiasts seeking a traditional and high-quality brewing experience. Its portability, manual control, and durability make it ideal for those who value precision and simplicity. With no electricity required, it offers a cost-effective and eco-friendly solution for espresso lovers. This machine is perfect for anyone looking to elevate their coffee game without compromising on flavor or convenience, making it a standout recommendation for those passionate about authentic espresso.