Month: March 2026

rotator cuff strengthening exercises resistance bands pdf

Category : PDF

Understanding the Rotator Cuff

The rotator cuff is a crucial group of muscles and tendons, stabilizing the shoulder joint and enabling a wide range of motion, especially important for athletes and active individuals․

Injuries are common, particularly with repetitive arm movements, impacting those in professions requiring overhead work or frequent reaching, and can significantly limit daily activities․

Often misunderstood due to its complexity, the rotator cuff is frequently neglected in exercise routines, even by those who are regularly active, leading to potential instability and pain;

What is the Rotator Cuff?

The rotator cuff isn’t a single muscle, but a group of four muscles – supraspinatus, infraspinatus, teres minor, and subscapularis – that surround the shoulder joint․ These muscles and their corresponding tendons work together to control shoulder movement and provide stability․ They essentially keep the head of your humerus (upper arm bone) securely within the glenoid cavity (socket) of your scapula (shoulder blade)․

This intricate system allows for a remarkable range of motion, enabling us to lift, rotate, and move our arms in countless directions․ The rotator cuff’s primary function is not power, but rather dynamic stabilization․ It controls the shoulder during movement, preventing dislocation and ensuring smooth, coordinated actions․

Understanding its composition is key to appreciating its vulnerability․ Because the tendons pass through a relatively narrow space, they are susceptible to compression and irritation, especially with repetitive overhead activities․ This can lead to inflammation, tendinitis, or even tears, impacting the shoulder’s functionality and causing significant discomfort․ Proper strengthening and conditioning are vital for maintaining its health․

Rotator Cuff Injuries: Common Causes

Rotator cuff injuries rarely stem from a single, acute event; more often, they develop gradually over time due to repetitive strain and overuse․ Individuals involved in occupations or sports requiring frequent overhead arm movements – such as painting, construction, tennis, or baseball – are particularly susceptible․ This repetitive motion can lead to micro-tears in the tendons, causing inflammation and pain․

Age is also a significant factor, as tendons naturally lose elasticity and become more prone to injury with age․ This degenerative process, combined with repetitive use, increases the risk of tears; However, acute injuries, like a fall directly onto the shoulder, can also cause immediate damage․

Poor posture and improper lifting techniques contribute to imbalances in shoulder mechanics, placing undue stress on the rotator cuff․ Neglecting to warm up properly before activity or failing to strengthen the surrounding muscles can further exacerbate the risk․ Addressing these factors is crucial for prevention and rehabilitation․

Symptoms of a Rotator Cuff Injury

The presentation of a rotator cuff injury can vary significantly, ranging from mild discomfort to debilitating pain․ A common initial symptom is a dull, aching pain deep within the shoulder, often radiating down the arm․ This pain typically worsens with overhead activities, reaching behind the back, or lifting heavy objects․

Many individuals experience weakness in the shoulder, making it difficult to perform everyday tasks like combing hair or reaching for items on a high shelf․ Night pain is also a frequent complaint, often disrupting sleep․ A clicking or popping sensation in the shoulder joint may be present, though not always indicative of a tear․

In more severe cases, a sudden, sharp pain can occur, potentially signaling a complete tear of one or more rotator cuff tendons․ This may be accompanied by significant loss of strength and range of motion․ Seeking prompt medical evaluation is crucial for accurate diagnosis and appropriate treatment․

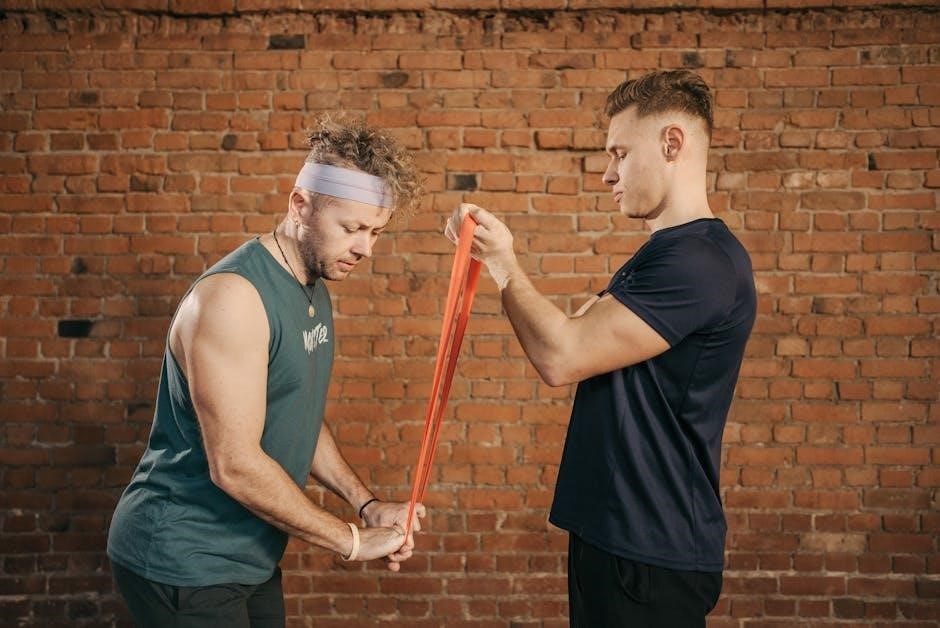
Resistance Bands for Rotator Cuff Strengthening

Resistance bands offer a simple, effective, and accessible method for strengthening the rotator cuff muscles, suitable for all fitness levels and aiding in injury recovery․

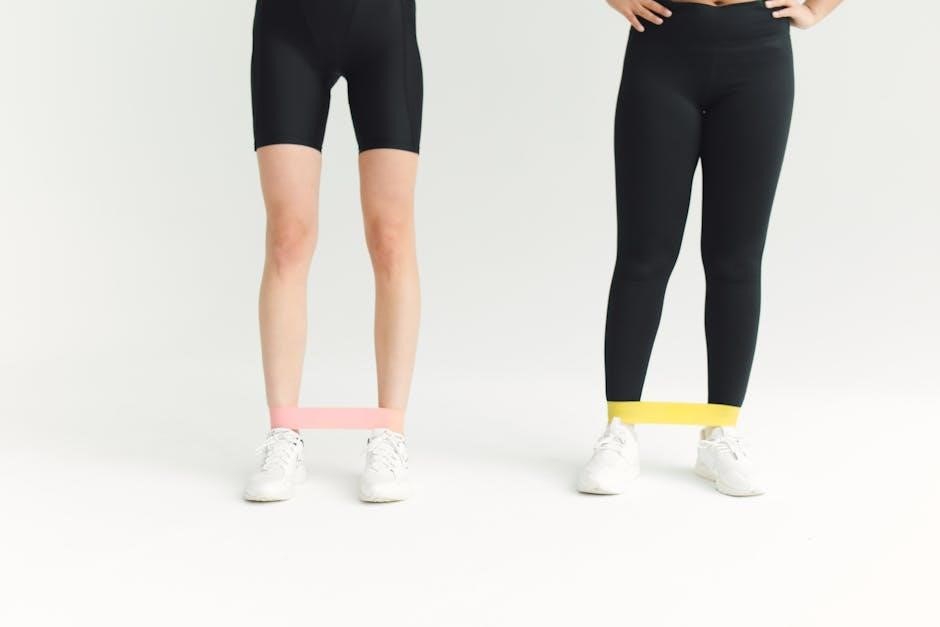
Benefits of Using Resistance Bands

Resistance bands provide a versatile and cost-effective approach to rotator cuff rehabilitation and strengthening, offering numerous advantages over traditional weights․ Their portability allows for exercise anywhere, making consistency easier to achieve, and they’re excellent for corrective exercises․

Unlike fixed-weight dumbbells, bands provide variable resistance, meaning the tension increases as the band stretches, closely mimicking the natural strength curve of the rotator cuff muscles․ This progressive resistance is ideal for building strength throughout the full range of motion․

Bands are also gentler on the joints, reducing the risk of further injury during rehabilitation, and are beneficial for beginners or those with limited strength․ They’re incredibly adaptable, suitable for both building muscle and aiding in functional movements like pull-ups․

Furthermore, resistance bands promote proper form, as they require controlled movements to maintain tension, and can be easily integrated into a comprehensive shoulder strengthening routine, promoting healing and preventing future injuries․

Choosing the Right Resistance Band

Selecting the appropriate resistance band is crucial for effective rotator cuff strengthening, and depends heavily on your current strength level and exercise goals․ Bands come in varying resistance levels, typically color-coded – from light to extra heavy․

Beginners should start with lighter resistance, focusing on proper form and controlled movements before progressing․ A light or medium band is often ideal for initial exercises, allowing you to build a foundation of strength without strain․

As you gain strength, gradually increase the resistance by switching to heavier bands․ This progressive overload is essential for continued muscle development and rehabilitation․ Consider having a set with multiple resistance levels for versatility․

Band material also matters; latex bands are common but can cause allergies, so consider latex-free options․ Length is another factor – longer bands are suitable for anchoring to doors or stable objects, while shorter bands are ideal for direct hand holds․

Safety Precautions When Using Resistance Bands

Prioritizing safety is paramount when incorporating resistance bands into your rotator cuff strengthening routine․ Always inspect bands for any cracks, tears, or signs of wear before each use; damaged bands can snap and cause injury․

Secure the band properly when anchoring it to a stable object, ensuring it won’t slip or move during exercise․ Avoid anchoring to unstable surfaces or objects that could topple over․ Maintain a firm grip throughout each repetition․

Control the movement throughout the entire range of motion, avoiding quick or jerky motions․ Focus on slow, deliberate contractions and extensions to maximize muscle engagement and minimize the risk of strain․

Listen to your body and stop immediately if you experience any pain․ Discomfort is a signal to adjust the exercise, reduce the resistance, or consult with a healthcare professional․ Proper form is more important than heavy resistance․

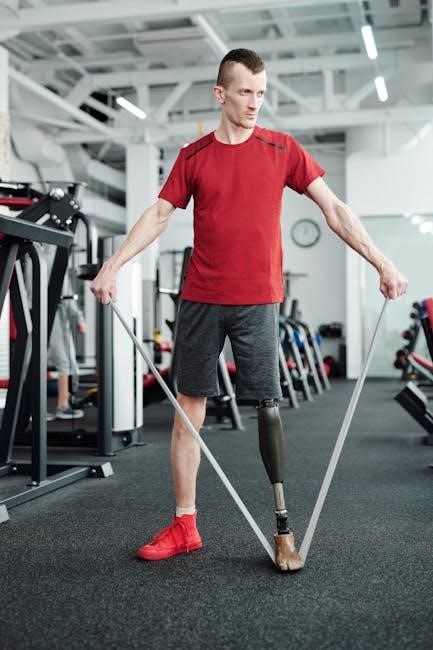
Rotator Cuff Strengthening Exercises with Resistance Bands

Resistance band exercises offer an accessible and effective way to rehabilitate and strengthen the rotator cuff, improving shoulder stability and range of motion for all fitness levels․

External Rotation

To perform external rotation with a resistance band, secure one end of the band to a stable object at elbow height․ Stand with your elbow bent at 90 degrees, keeping it tucked close to your side․ Hold the other end of the band with your hand․

Slowly rotate your forearm outward, away from your body, maintaining the 90-degree angle at your elbow․ Focus on squeezing the muscles in the back of your shoulder as you rotate․ Control the movement throughout the entire range of motion․

This exercise specifically targets the infraspinatus and teres minor, key muscles in the rotator cuff responsible for external rotation and shoulder stability․ It’s an important exercise for preventing and rehabilitating common shoulder injuries․

Trainer Kathleen Trotter demonstrates proper form, emphasizing the importance of controlled movements and maintaining correct posture․ Aim for 10-15 repetitions per set, focusing on quality over quantity․ Gradually increase resistance as you gain strength․

Remember to avoid compensating with other muscles, such as shrugging your shoulders or rotating your body․ Keep your core engaged and maintain a stable base throughout the exercise․ This will maximize effectiveness and minimize risk of injury․

Internal Rotation

For internal rotation using a resistance band, anchor the band securely to a stable object, again at elbow height․ Position yourself with your elbow bent at 90 degrees, firmly pressed against your side․ Grip the band with your hand, ensuring a comfortable hold․

Slowly rotate your forearm inward, towards your body, keeping your elbow tucked in․ Concentrate on activating the subscapularis muscle, the primary internal rotator of the shoulder․ Maintain control throughout the entire movement, avoiding jerky motions․

This exercise complements external rotation, balancing the forces around the shoulder joint and promoting overall stability․ It’s particularly beneficial for individuals with imbalances or those recovering from specific injuries․

Focus on a smooth, controlled arc of motion, and avoid letting the band snap back․ Aim for 10-15 repetitions per set, gradually increasing the band’s resistance as your strength improves․ Proper form is crucial to prevent strain․

Ensure your shoulder blade remains stable and doesn’t move during the rotation․ Engage your core to maintain a neutral spine and prevent unwanted compensation․ This exercise is effective for building strength and improving range of motion․

Scaption

Scaption, a unique shoulder exercise, targets the supraspinatus muscle, a key component of the rotator cuff․ To perform it with a resistance band, stand with your feet shoulder-width apart, stepping on the band to secure it․ Hold the band’s ends with your palms facing each other․

Raise your arms at a 30-45 degree angle forward and outward – this is the “scapular plane․” Avoid lifting directly to the front or side․ This angle minimizes impingement and maximizes supraspinatus activation․ Keep a slight bend in your elbows throughout the movement․

Focus on initiating the movement from your shoulder, not your arm․ Imagine drawing your shoulder blades down and back slightly as you lift․ This engages the stabilizing muscles around the scapula․

Slowly lower your arms back to the starting position, maintaining control․ Aim for 10-15 repetitions per set, adjusting the band’s resistance to challenge yourself appropriately․ Proper form is paramount to avoid injury․

Scaption is excellent for improving shoulder function and reducing pain, particularly in individuals with impingement or rotator cuff tendinopathy․ It’s a gentle yet effective exercise for building strength and stability․

Rows

Resistance band rows are fundamental for strengthening the posterior shoulder muscles, crucial for rotator cuff health and balanced shoulder function․ Secure the resistance band around a stable object at chest height, or sit with your legs extended and the band looped around your feet․

Grasp the band with your palms facing each other, maintaining a slight bend in your elbows․ Sit upright with a straight back, engaging your core muscles to stabilize your spine․ Pull the band towards your torso, squeezing your shoulder blades together․

Focus on initiating the movement from your back muscles, not just your arms․ Imagine pulling with your elbows, keeping them close to your body․ Avoid shrugging your shoulders or using momentum to complete the exercise․

Slowly return to the starting position, controlling the band’s resistance․ Perform 10-15 repetitions per set, adjusting the band’s tension to match your strength level․

Rows counteract the common forward-rounded posture, strengthening the muscles needed to pull your shoulders back and down․ This improves posture and reduces strain on the rotator cuff, promoting long-term shoulder health․

Shoulder Abduction

Resistance band shoulder abduction targets the deltoid muscles, specifically the medial (side) portion, contributing to shoulder stability and range of motion․ Secure the resistance band under your feet, holding the ends with your hands, palms facing your body․

Stand with your feet shoulder-width apart, maintaining a slight bend in your elbows․ Keeping your back straight and core engaged, slowly raise your arms out to the sides, away from your body, until they reach shoulder height․

Avoid shrugging your shoulders or leaning your body to assist the movement; focus on isolating the deltoid muscles․ Maintain a controlled tempo throughout the exercise, resisting the band’s pull on the way up and down․

Slowly lower your arms back to the starting position, maintaining tension on the band․ Perform 10-15 repetitions per set, adjusting the band’s resistance to challenge your muscles appropriately․

This exercise is beneficial for improving shoulder function and preventing imbalances that can contribute to rotator cuff issues․ Consistent abduction exercises enhance shoulder stability and overall upper body strength․

Overhead Press

The resistance band overhead press effectively strengthens the deltoids and upper trapezius, crucial for shoulder stability and functional movement․ Secure the band under your feet, grasping the ends with hands positioned at shoulder-width apart, palms facing forward․

Maintain a stable core and upright posture, with a slight bend in your elbows․ Slowly press the band upwards, extending your arms overhead until they are nearly straight, but avoid locking your elbows․

Focus on controlled movement, resisting the band’s pull throughout the entire range of motion․ Ensure your shoulders remain relaxed and do not shrug upwards during the press․

Slowly lower the band back to the starting position, maintaining tension and control․ Perform 10-15 repetitions per set, adjusting band resistance to match your strength level․

This exercise enhances shoulder strength and endurance, contributing to improved overhead mobility and reduced risk of injury․ Regular overhead presses are vital for maintaining a healthy and functional shoulder joint․

Bicep Curls with External Rotation

This combined exercise uniquely targets both the biceps and the external rotators of the rotator cuff, promoting comprehensive shoulder and arm strength․ Secure the resistance band under your feet, holding the ends with palms facing upwards, elbows close to your sides․

Initiate the movement by performing a standard bicep curl, bringing your hands towards your shoulders․ Simultaneously, as you curl, rotate your forearms outwards, emphasizing external rotation of the shoulder․

Maintain a controlled tempo throughout the exercise, focusing on the simultaneous activation of the biceps and external rotator muscles․ Avoid swinging your body or using momentum to complete the movement․

Slowly lower your arms back to the starting position, reversing both the curl and the external rotation․ Perform 10-15 repetitions per set, adjusting band resistance as needed․

This exercise improves both strength and coordination, enhancing shoulder stability and functional movement patterns․ It’s a valuable addition to any rotator cuff rehabilitation or strengthening program․

Creating a Rotator Cuff Strengthening Routine

A well-structured routine is vital for optimal recovery and prevention, incorporating warm-up, targeted exercises, and cool-down phases for balanced muscle engagement and injury avoidance․

Warm-up Exercises

Preparing the shoulder muscles is paramount before initiating resistance band exercises․ A dynamic warm-up increases blood flow, improves range of motion, and reduces the risk of injury․ Begin with arm circles – both forward and backward – performing 10-15 repetitions in each direction․ These gently mobilize the shoulder joint․

Next, incorporate shoulder rotations using a light resistance band․ Anchor the band and perform internal and external rotations with controlled movements, again for 10-15 repetitions on each side․ This mimics the actions used in strengthening exercises, priming the rotator cuff muscles․

Cross-body shoulder stretches are also beneficial․ Gently pull one arm across your body, holding it for 15-20 seconds, and repeat on the other side․ This improves flexibility and prepares the muscles for the demands of the workout․ Finally, include scapular retractions – squeezing your shoulder blades together – to activate the muscles responsible for shoulder stability․ Perform 10-15 repetitions․ A thorough warm-up is non-negotiable for safe and effective rotator cuff strengthening․

Cool-down Exercises

Concluding your rotator cuff strengthening routine with a cool-down is essential for muscle recovery and flexibility․ Static stretches, held for 20-30 seconds, help to lengthen the muscles and reduce post-exercise soreness․ Begin with a cross-body shoulder stretch, gently pulling your arm across your chest until you feel a comfortable stretch in your shoulder․

Follow this with a sleeper stretch, bringing your injured arm across your body and using your other hand to gently push your elbow towards your chest․ This targets the posterior rotator cuff muscles․ Next, perform a triceps stretch by reaching one arm overhead and bending it at the elbow, using your other hand to gently pull your elbow further down․

Doorway pec stretch is also beneficial, placing your forearms on a doorway frame and gently leaning forward․ These stretches promote relaxation and improve range of motion, aiding in the recovery process․ Remember to breathe deeply throughout each stretch, maximizing its effectiveness and minimizing muscle tension․

Frequency and Repetitions

Consistency is key when strengthening your rotator cuff․ Aim to perform your resistance band exercises 2-3 times per week, allowing for at least one full day of rest between sessions to facilitate muscle recovery and prevent overtraining․ Begin with 2-3 sets of 10-15 repetitions for each exercise, focusing on controlled movements rather than speed․

Proper form is paramount; prioritize quality over quantity․ If you experience any pain, immediately stop the exercise and consult with a healthcare professional․ As your strength improves, you can gradually increase the resistance of the bands or the number of repetitions․

Listen to your body and adjust the frequency and repetitions accordingly․ Avoid pushing yourself too hard, especially in the initial stages of rehabilitation․ A progressive approach, gradually increasing the challenge, will yield the best results and minimize the risk of re-injury․ Remember, patience and consistency are vital for long-term success․

Progressing Your Routine

As your rotator cuff strengthens, it’s crucial to progressively challenge your muscles to continue seeing improvements․ This can be achieved in several ways․ First, increase the resistance of your bands by switching to a heavier band or doubling up on lighter bands․ Second, gradually increase the number of repetitions per set, aiming for 15-20 reps before increasing resistance․

Introduce more challenging variations of the exercises․ For example, slow down the eccentric (lowering) phase of the movement to increase time under tension․ You can also add sets, progressing from 2 to 3 or even 4 sets per exercise․

Consider incorporating more complex movements that challenge shoulder stability in multiple planes of motion․ Always prioritize proper form and listen to your body, avoiding any movements that cause pain․ A gradual and consistent progression will maximize your results and minimize the risk of setbacks․


havdalah blessings pdf

Category : PDF

Havdalah Blessings PDF: A Comprehensive Guide

Havdalah, marking the week’s end, finds readily available PDF resources offering blessings for easy access․ These digital guides streamline preparation,
providing convenient, printable formats for personal or communal use․ Windows 11’s built-in ‘Get Help’ app can also assist with understanding the ceremony․

What is Havdalah?

Havdalah is a Jewish religious ceremony that marks the symbolic separation between the holy day (Shabbat or a festival) and the rest of the week․ The name itself, meaning “separation,” encapsulates its core purpose․ It’s a ritual performed at the conclusion of Shabbat on Saturday evening, or after a Jewish festival․

The ceremony involves reciting blessings over wine, fragrant spices (besamim), and a braided candle (ner)․ These sensory experiences – taste, smell, and sight – are designed to heighten our awareness of the transition․ It’s a moment to acknowledge the unique sanctity of the holy day and to prepare to re-enter the routines of the week․

Finding PDF resources detailing the blessings and order of the ceremony is common, offering a convenient way to participate․ Windows support resources, like the ‘Get Help’ app, can provide further context for understanding the ritual’s significance․

The Significance of Havdalah Blessings

The Havdalah blessings aren’t merely formulaic recitations; they hold deep spiritual meaning․ The blessing over wine symbolizes joy and sanctification, recalling the special blessings of the Shabbat or festival․ The spices, with their sweet aroma, represent the “extra soul” (neshamah yeteirah) believed to accompany us on holy days, a soul we acknowledge is departing․

The light of the candle embodies both the creation of light on the first day of creation and the commandment to observe Shabbat․ Each element serves as a reminder of the unique spiritual experience we’ve had and a grateful acknowledgement of God’s gifts․

PDF guides containing these blessings facilitate proper observance․ Accessing these resources, even through Windows 11’s support features, allows individuals to connect with this ancient tradition and its profound symbolism․

Understanding the Components of Havdalah

Havdalah comprises distinct elements, each with symbolic weight․ The ceremony centers around four essential components: wine (or grape juice), spices, a braided candle, and the blessings themselves․ The wine, traditionally in a goblet (kos), represents joy and holiness․ Spices, often held in a besamim box, evoke the fragrance of the departed Shabbat or festival․

The braided candle, with multiple wicks, symbolizes the distinction between the holy day and the weekday․ The blessings, readily available in PDF format, articulate gratitude for these distinctions and the spiritual uplift experienced․

Understanding these components, aided by accessible PDF guides, enhances the ritual’s meaning․ Even utilizing Windows 11’s ‘Get Help’ feature can clarify the purpose of each element, fostering a deeper connection to the tradition․

Sources for Havdalah Blessings PDFs

PDF blessings are found on official Jewish organization websites, synagogue resources, and online Jewish libraries․ Windows 11’s help app can also guide searches․

Official Jewish Organizations Offering PDFs

Several prominent Jewish organizations provide downloadable Havdalah blessing PDFs, catering to diverse needs and traditions․ Organizations like My Jewish Learning and Chabad․org frequently offer comprehensive guides, often including transliterations and explanations alongside the Hebrew text․ These resources are generally free to access and download, promoting wider participation in the Havdalah ceremony․

These PDFs often include not only the core blessings but also supplementary materials like background information on the ritual, explanations of the symbolic items used (wine, spices, and light), and sometimes even audio pronunciations․ The accessibility of these resources is enhanced by their compatibility with various devices, allowing users to view and print them easily․ Remember, Windows 11’s ‘Get Help’ feature can assist in locating these organizations online if needed․

Synagogue Websites and Resources

Many synagogues proactively offer Havdalah blessing PDFs on their websites as a service to their congregations and the wider Jewish community․ These resources are often tailored to the specific minhag (custom) of that particular synagogue, reflecting Ashkenazi or Sephardi traditions, or unique local practices․ Checking the website of your local synagogue is an excellent starting point for finding a relevant and accurate PDF․

Beyond PDFs, synagogue websites may also host online guides, instructional videos, or links to other helpful resources related to Havdalah․ Some even provide downloadable song sheets for the zemirot (songs) traditionally sung during the ceremony․ If you encounter difficulties accessing these resources, remember Windows 11’s built-in ‘Get Help’ app can offer troubleshooting assistance․

Online Jewish Libraries and Archives

Numerous online Jewish libraries and archives house digitized collections of siddurim (prayer books) and machzorim (festival prayer books) which frequently include Havdalah blessings․ These digital resources often allow you to download specific pages or entire sections as PDFs, providing access to historical and varied liturgical texts․ Sefaria, for example, is a widely used platform offering searchable Jewish texts, including Havdalah prayers․

Exploring these archives can reveal variations in the blessings across different communities and time periods․ Remember to verify the source and authenticity of any PDF downloaded from these platforms․ If you experience issues with accessing or downloading files, Windows 11’s ‘Get Help’ application can provide guidance on PDF reader compatibility and security concerns․

Key Blessings Included in a Havdalah PDF

Havdalah PDFs typically contain blessings over wine, spices, and light—essential components of the ceremony․ Windows 11 support can aid
understanding․

The Blessing Over Wine (Kos)

The blessing over wine (Kos) is central to Havdalah, symbolizing joy and sanctification․ A Havdalah PDF will invariably include the Hebrew text and transliteration of this blessing, often with a translation into English․ The blessing expresses gratitude for the gift of the Sabbath and acknowledges God’s distinction between the sacred and the mundane․

Typically, the blessing begins with “Baruch Atah Adonai…” (Blessed are You, Lord…), followed by specific phrasing relating to the fruit of the vine․ PDFs may also offer guidance on the type of wine suitable for Havdalah – generally, kosher wine is preferred․ Some resources, like those found through Windows 11’s ‘Get Help’ feature, might explain the symbolic significance of using wine specifically․ The PDF often clarifies the proper way to hold the cup and recite the blessing, ensuring a meaningful and reverent experience․

The Blessing Over Spices (Besamim)

The Blessing over Spices (Besamim) represents the restoration of the senses after the spiritual elevation of Shabbat․ A comprehensive Havdalah PDF will feature the Hebrew text, transliteration, and English translation of this blessing․ The fragrance of the spices – traditionally cloves, cinnamon, or myrtle – symbolizes the anticipation of the coming week and the renewed engagement with the physical world․

The blessing, beginning with “Baruch Atah Adonai…”, expresses gratitude for the gift of these fragrant plants․ PDF resources often detail the proper method of experiencing the scent – circling the spices around those present, allowing everyone to partake․ Online guides, accessible via Windows 11’s support tools, may explain the historical origins of this custom․ The PDF may also suggest alternatives if traditional spices are unavailable, ensuring the ritual can be observed meaningfully․

The Blessing Over Light (Ner)

The Blessing Over Light (Ner) symbolizes the gift of fire, representing both the creation of light on the first day and the spiritual illumination experienced during Shabbat․ A detailed Havdalah PDF will include the complete Hebrew text, a phonetic transliteration for accurate pronunciation, and a clear English translation of the blessing․ This blessing, starting with “Baruch Atah Adonai…”, expresses gratitude for the divine source of light․

Traditionally, this blessing is recited while gazing upon the flame of a multi-wick candle, its reflection in the participant’s rings being considered auspicious․ PDF guides often illustrate the proper candle-lighting procedure and the significance of the reflected light․ Resources found through Windows 11’s ‘Get Help’ app may offer historical context; The PDF may also address safety precautions when working with fire, ensuring a respectful and secure ceremony․

Variations in Havdalah Blessings

Havdalah PDF resources detail Ashkenazi and Sephardi traditions, community customs, and festival adaptations, offering diverse blessing texts for varied observances․

Ashkenazi vs․ Sephardi Traditions

Havdalah Blessings PDFs often present variations between Ashkenazi and Sephardi traditions, reflecting distinct liturgical customs․ Ashkenazi PDFs typically include a longer text for the blessing over spices (besamim), emphasizing the fragrance as a reminder of the sweetness of the Sabbath․ Sephardi PDFs, conversely, generally feature a shorter, more concise version of this blessing․

Furthermore, the phrasing and emphasis within the wine blessing (kos) can differ․ Some Sephardi PDFs may include additional poetic verses not found in Ashkenazi versions․ These PDF resources are invaluable for individuals seeking to observe Havdalah according to their family’s heritage․ Understanding these nuances, readily available in detailed PDF guides, ensures a meaningful and authentic experience․ Windows 11’s ‘Get Help’ app can also provide background information․

Differences Based on Community Custom

Havdalah Blessings PDFs frequently showcase how community customs influence the ceremony․ While core blessings remain consistent, specific additions or alterations are common․ Some communities incorporate unique melodies for the El Malei Rachamim prayer, often included in PDF versions alongside the standard text․ Others may have distinct customs regarding the extinguishing of the Havdalah candle, detailed in specialized PDF guides․

Certain PDFs reflect local poetic additions (piyutim) recited during the blessing over light (ner)․ These variations demonstrate the living tradition of Havdalah․ Accessing PDFs from different communities provides insight into these diverse practices․ Windows 11’s ‘Get Help’ app can assist in researching these regional differences, enhancing understanding and appreciation of the ceremony’s adaptability․

Havdalah for Yom Tov (Festivals)

Havdalah Blessings PDFs often include specific adaptations for marking the conclusion of festivals (Yom Tov)․ Unlike weekly Havdalah, the blessing over spices (besamim) is omitted after Yom Tov, a distinction clearly outlined in many PDF resources․ Specialized PDF guides detail the modified text of the El Malei Rachamim prayer recited on festival evenings, acknowledging the unique joy of the occasion․

Some PDFs provide comparative charts illustrating the differences between regular and festival Havdalah, aiding in accurate observance․ These resources emphasize the importance of recognizing the distinct character of each ceremony․ Windows 11’s ‘Get Help’ app can assist in locating PDFs detailing these nuanced variations, ensuring a meaningful and correct Havdalah experience after a Yom Tov․

Using a Havdalah Blessings PDF

Havdalah Blessings PDFs simplify ceremony preparation; printing ensures accessibility, while following the blessing order enhances the ritual experience․ Windows 11’s support tools aid understanding․

Preparing for the Havdalah Ceremony

Before commencing the Havdalah ceremony, ensure you have a readily accessible Havdalah Blessings PDF․ This digital resource streamlines the process, providing all necessary texts in a convenient format․ Gather the essential ritual items: a kosher wine (or grape juice), a spice box (besamim), and a braided candle․

Familiarize yourself with the order of blessings within the PDF․ Printing a physical copy is recommended for ease of use during the ceremony, especially if relying on a device during the ritual feels disruptive․ Consider the lighting; a well-lit space enhances the experience, particularly when appreciating the ner (candle)․

If utilizing a digital PDF on a device, ensure it’s fully charged or connected to a power source․ For those less familiar with the blessings, reviewing the PDF beforehand builds confidence and allows for a more meaningful participation․ Windows 11’s ‘Get Help’ app can offer additional guidance if needed, though it’s best to have the core texts prepared beforehand․

Following the Order of the Blessings

A typical Havdalah Blessings PDF presents the blessings in a specific sequence․ Begin with the blessing over wine (Kos), reciting the appropriate Hebrew text found within the PDF․ Next, proceed to the blessing over spices (Besamim), inhaling the fragrant aromas as you articulate the blessing․

Following the spices, offer the blessing over the Havdalah candle (Ner), appreciating its light as a symbol of the departing Sabbath․ Many PDF versions include the concluding prayer, “Hamavdil bein kodesh l’chol,” distinguishing between the sacred and the mundane․

Carefully follow the transliteration and translation provided in your PDF, especially if unfamiliar with Hebrew pronunciation․ Windows 11’s ‘Get Help’ feature might offer phonetic assistance, but the PDF should be your primary guide․ Maintaining this order ensures a complete and traditionally accurate Havdalah observance․

Printing and Accessibility of PDFs

Havdalah Blessings PDFs are designed for easy printing, allowing users to have a physical copy during the ceremony․ Ensure your printer settings are configured for optimal readability, selecting a clear font size and paper orientation․ Many PDF readers, like Adobe Acrobat Reader, offer accessibility features for visually impaired individuals․

These features include text-to-speech functionality, enabling the blessings to be read aloud․ Consider the PDF’s formatting; a well-structured document will be more accessible․ If encountering issues, explore alternative PDF readers or consider converting the PDF to a different format․

Windows 11’s built-in tools can assist with PDF viewing and accessibility․ Troubleshooting download or security concerns is crucial; only download PDFs from reputable sources․ A properly formatted and accessible PDF enhances the Havdalah experience for everyone․

Troubleshooting PDF Issues

Havdalah Blessings PDFs may present compatibility, download, or security challenges․ Windows 11’s ‘Get Help’ app offers solutions for PDF reader errors and potential issues․

PDF Reader Compatibility

Ensuring your device has a compatible PDF reader is crucial for accessing Havdalah Blessings PDFs correctly․ Older systems, like Windows 7, might require updated software․ Adobe Acrobat Reader is a widely used, reliable option, but alternatives like Foxit Reader or even modern web browsers (Chrome, Edge, Firefox) can also open and display PDF files․

If you encounter display errors – missing text, garbled characters, or formatting issues – first try updating your PDF reader to the latest version․ If problems persist, experiment with different readers to see if one renders the document properly․ Sometimes, a specific PDF might be created with features not fully supported by all readers․ Windows 11’s ‘Get Help’ app can guide you through software updates and troubleshooting steps if needed․ Remember to check for potential security risks when downloading PDF readers from unfamiliar sources․

Download and Security Concerns

Downloading Havdalah Blessings PDFs from unfamiliar websites carries inherent security risks․ Always prioritize official Jewish organizations, synagogue websites, or reputable online libraries․ Be wary of sites offering “free” PDFs that seem too good to be true, as they may contain malware or viruses․ Ensure your antivirus software is up-to-date before downloading any file․

Scrutinize the website’s URL and look for “https” – indicating a secure connection․ Avoid clicking on suspicious links or advertisements․ If a site requests excessive personal information before allowing a download, it’s a red flag․ Windows 8 and older systems are particularly vulnerable, so exercise extra caution․ Utilize Windows 11’s built-in security features or the ‘Get Help’ app to scan downloaded files for threats․ Prioritize safety when accessing religious texts online․

Finding Alternative Formats

If PDF access proves problematic – due to reader compatibility or download issues – explore alternative formats for Havdalah blessings․ Many synagogues and Jewish educational websites offer the blessings directly on their webpages, eliminating the need for a downloadable file․ Text-based versions can be easily copied and pasted into a document editor․

Consider accessing the blessings through online Havdalah guides or tutorials, which often display the text alongside audio pronunciations․ If you encounter issues with Windows 7 or older systems, utilizing a modern browser may improve compatibility․ The ‘Get Help’ app in Windows 11 can also direct you to accessible resources․ For visually impaired individuals, look for websites offering screen-reader compatible text or audio recordings of the blessings․

Resources for Learning More About Havdalah

Explore Jewish websites, books, and online tutorials for deeper understanding․ Windows 11’s ‘Get Help’ app provides quick access to relevant information and support․

Jewish Educational Websites

Numerous Jewish educational websites offer comprehensive resources for understanding Havdalah and accessing blessings, often in downloadable PDF format․ My Jewish Learning (myjewishlearning․com) provides detailed explanations of the ceremony’s origins, significance, and the meaning behind each blessing․ Chabad․org (chabad․org) features a wealth of information, including printable Havdalah guides and audio pronunciations of the blessings, catering to various traditions․

Additionally, Aish․com (aish․com) presents insightful articles and videos exploring the spiritual aspects of Havdalah․ These platforms often include sections dedicated to Jewish holidays and practices, making it easy to navigate and find relevant content․ Utilizing Windows 11’s search function or the ‘Get Help’ app can quickly direct you to these valuable online resources, ensuring a richer and more informed Havdalah experience; These sites frequently update their materials, providing current and accurate information․

Books on Jewish Holidays and Practices

Several authoritative books delve into the intricacies of Jewish holidays, including Havdalah, and often contain the blessings themselves, suitable for transcription or reference when creating a personal PDF guide․ “The Complete Book of Jewish Holidays” by Levin and Schwartz provides a detailed overview of each festival, including Havdalah’s customs and prayers․ Similarly, “To Be a Jew” by Rabbi Hayim Halevy Donin offers a comprehensive exploration of Jewish law and practice, with a dedicated section on Havdalah․

Furthermore, ArtScroll’s series of prayer books and holiday companions frequently include the Havdalah blessings in both Hebrew and English transliteration․ These resources offer historical context and explanations of the ritual’s symbolism․ Windows 11’s search capabilities can assist in locating these books through online retailers or library catalogs, supplementing digital resources and providing a tactile learning experience․

Online Havdalah Guides and Tutorials

Numerous websites offer step-by-step guides and video tutorials on performing the Havdalah ceremony, often including downloadable PDF versions of the blessings․ My Jewish Learning and Chabad․org are excellent resources, providing detailed explanations of each component and the associated blessings in both Hebrew and English․ These platforms frequently feature printable Havdalah guides, simplifying preparation․

Additionally, YouTube hosts a wealth of instructional videos demonstrating the proper way to recite the blessings and use the traditional Havdalah implements․ Searching for “Havdalah tutorial” yields numerous results catering to different levels of familiarity with the ritual․ Windows 11’s browser integration allows easy access to these resources, and the ‘Get Help’ app can assist with troubleshooting any technical issues encountered while viewing or downloading materials․


cuisinart frozen yogurt ice cream and sorbet maker instructions

Category : Instructions

Cuisinart offers diverse models – ICE-70, ICE-21, ICE-30BCU, and ICE60W – enabling delightful homemade frozen treats․ Enjoy crafting unique, flavorful desserts easily!

Overview of Cuisinart Models (ICE-70, ICE-21, ICE-30BCU, ICE60W)

Cuisinart presents a range of frozen dessert makers to suit various needs․ The ICE-70 is a premium Gelateria series, offering a larger 2-quart capacity․ The ICE-21 is an automatic model, simplifying the process for beginners․ ICE-30BCU features a unique flavor-duo function, allowing simultaneous preparation of two flavors․ Finally, the ICE60W provides a convenient and compact option for smaller batches․

Each model boasts a double-insulated freezer bowl, crucial for optimal freezing․ Understanding these distinctions helps select the perfect machine for your frozen yogurt, ice cream, gelato, or sorbet creations․ Consider capacity, automation features, and desired versatility when choosing․

Benefits of Making Homemade Frozen Desserts

Creating frozen desserts at home with a Cuisinart machine offers numerous advantages․ You gain complete control over ingredients, avoiding artificial flavors, colors, and excessive sugars found in store-bought options․ This is especially beneficial for dietary restrictions or preferences, like vegan or low-sugar diets․

Homemade treats allow for endless flavor customization – experiment with unique combinations! It’s a fun, rewarding activity, perfect for families․ Plus, the freshness and quality are unmatched, delivering a superior taste experience․ Enjoy the satisfaction of crafting delicious, healthy desserts!

Understanding Your Cuisinart Machine

Familiarize yourself with the components! Proper preparation of the freezing bowl is crucial for success․ Careful assembly ensures optimal performance and delicious results․

Key Components and Their Functions

The Cuisinart frozen dessert makers feature several key parts working in harmony․ The freezing bowl, typically double-walled and pre-frozen, is essential for initiating the freezing process․ A mixing paddle continuously churns the mixture, incorporating air and creating a smooth texture․ The motor base houses the motor that drives the paddle․

Lids are crucial for containing the mixture during churning and often include openings for adding ingredients․ Some models have a transparent cover allowing you to monitor the process․ Understanding each component’s role is vital for successful operation and achieving the perfect frozen consistency․ Proper care and maintenance of these parts will extend the life of your machine․

Freezing Bowl Preparation – Essential Steps

Proper freezing of the bowl is paramount for successful results․ Ensure the bowl is completely dry before placing it in the freezer; any moisture will hinder freezing․ It requires at least 24 hours of freezing time, ideally longer, at 0°F (-18°C) or lower․

Avoid refreezing a partially thawed bowl, as this can compromise its freezing capacity․ A fully frozen bowl will feel very cold to the touch; Before assembly, check for any ice crystals; these indicate sufficient freezing․ Consistent, thorough freezing guarantees optimal performance and a perfectly frozen dessert every time․

Assembly and Disassembly Instructions

Assembly begins with ensuring the frozen bowl is securely placed on the base․ Next, attach the bowl holder and then the clear lid․ The dasher, responsible for mixing, should be inserted into the lid’s opening․ Ensure it spins freely․

Disassembly is the reverse process․ Always unplug the machine before dismantling․ Remove the lid, then the dasher․ Carefully lift off the bowl holder and finally, the frozen bowl․ Handle the frozen bowl with care to avoid damage․ Proper assembly and careful disassembly ensure longevity and safe operation․

Recipes & Ingredients

Explore basic frozen yogurt, classic ice cream, and refreshing sorbet recipes․ Ingredient quality significantly impacts the final product’s taste and texture – choose wisely!

Basic Frozen Yogurt Recipe

Creating a simple frozen yogurt is a fantastic starting point! Combine 2 cups of your favorite yogurt (Greek yogurt yields a thicker result) with ¾ cup of milk, and ¾ cup of sugar in a saucepan․ Heat gently, stirring until the sugar dissolves completely – avoid boiling․

Allow the mixture to cool thoroughly before pouring it into your pre-frozen Cuisinart freezing bowl․ Churn for approximately 20-25 minutes, or until it reaches a soft-serve consistency․ For added flavor, incorporate ½ cup of fruit puree or extracts during the last few minutes of churning․ Enjoy immediately, or freeze for a firmer texture!

Classic Ice Cream Recipe

For a timeless ice cream experience, begin with a rich custard base․ Whisk together 2 cups of heavy cream, 1 cup of whole milk, ¾ cup of sugar, and a pinch of salt in a saucepan․ Gently heat, stirring until the sugar dissolves․ In a separate bowl, whisk 4 egg yolks․ Temper the yolks by slowly drizzling in some of the warm cream mixture, then pour it back into the saucepan․

Cook over medium heat, stirring constantly, until the custard thickens enough to coat the back of a spoon․ Cool completely, then churn in your pre-frozen Cuisinart bowl for 20-25 minutes․

Refreshing Sorbet Recipe

To create a vibrant sorbet, start with a simple syrup․ Combine 1 cup of water and ¾ cup of sugar in a saucepan, heating until the sugar dissolves․ Let it cool completely․ Next, blend 2 cups of your favorite fruit – berries, mango, or peaches work wonderfully – into a smooth puree․

Combine the cooled simple syrup and fruit puree․ Pour the mixture into your pre-frozen Cuisinart freezing bowl and churn for approximately 20-30 minutes, or until it reaches a slushy, sorbet-like consistency․ Enjoy a light and flavorful treat!

Ingredient Quality and Considerations

For optimal results, prioritize high-quality ingredients․ Full-fat dairy yields a creamier texture in ice cream and frozen yogurt․ Fresh fruit provides the best flavor for sorbets, though frozen fruit is a convenient alternative․

Avoid ingredients with excessive water content, as this can lead to icy results․ Using extracts instead of artificial flavorings enhances the overall taste․ Consider the sugar content; adjusting it impacts the final texture and sweetness․ Experiment with different ingredients to discover your perfect frozen dessert!

Operating Instructions

Follow these simple steps for delicious results! Properly prepare the freezing bowl, assemble the machine, and pour in your chilled mixture for perfect frozen treats․

Step-by-Step Guide to Making Ice Cream

Begin by ensuring the freezing bowl is thoroughly chilled – ideally overnight․ Prepare your ice cream base according to your chosen recipe, ensuring all ingredients are well combined and chilled before starting․ Carefully assemble the Cuisinart ice cream maker, securing the bowl and dasher․

Pour the chilled mixture into the freezing bowl, being mindful not to overfill – leave space for expansion during churning․ Power on the machine and allow it to churn for approximately 20-25 minutes, or until the mixture reaches a soft-serve consistency․

For a firmer texture, transfer the ice cream to a freezer-safe container and freeze for an additional 2-4 hours․ Enjoy your homemade creation!

Step-by-Step Guide to Making Frozen Yogurt

Start with a fully frozen bowl, chilling it overnight is crucial for optimal results․ Prepare your frozen yogurt base, combining yogurt, sweeteners, and any desired flavorings․ Ensure the mixture is well chilled before proceeding to the next step․ Assemble the Cuisinart machine, securely attaching the freezing bowl and dasher․

Pour the chilled yogurt mixture into the bowl, leaving sufficient headspace for expansion during churning․ Turn on the machine and let it churn for approximately 20-30 minutes, or until it reaches a soft-serve consistency․

Transfer to a freezer for 2-4 hours for a firmer texture․

Step-by-Step Guide to Making Sorbet

Begin by ensuring your freezing bowl is completely frozen – a minimum of 24 hours is recommended․ Prepare your sorbet base, typically consisting of fruit puree, sugar, and water․ Strain the mixture to remove any seeds or pulp for a smoother texture․ Chill the sorbet base thoroughly in the refrigerator before churning․

Assemble the Cuisinart ice cream maker, securely attaching the frozen bowl and dasher․ Pour the chilled sorbet base into the bowl, being mindful not to overfill․ Activate the machine and allow it to churn for 20-30 minutes․

Freeze for firmness․

Troubleshooting Common Issues

If your machine isn’t freezing, ensure the bowl is fully frozen․ For a thin mixture, extend churning time or refreeze․ Check motor safety features!

Machine Not Freezing – Causes and Solutions

A common frustration is a Cuisinart machine failing to freeze․ First, verify the freezing bowl is completely frozen – typically requiring 16-24 hours․ Ensure it’s level in the freezer and hasn’t been disturbed․ Secondly, confirm the mixture is adequately chilled before pouring it into the machine; room-temperature liquids hinder freezing․

If the bowl is frozen and the mixture chilled, the issue might be insufficient churning time․ Allow the machine to run for the full recommended duration․ Finally, check the motor; overheating can trigger a safety shut-off․ Let it cool before restarting․ A properly prepared bowl and chilled base are key!

Mixture Not Thickening – Adjustments Needed

If your frozen dessert isn’t thickening, several adjustments can help․ First, ensure your recipe’s ingredient ratios are correct – too much liquid prevents proper freezing․ Consider adding a stabilizer like guar gum or cornstarch (a small amount!) to improve texture․

Secondly, extend the churning time․ Some recipes require longer processing․ Finally, verify the freezing bowl is thoroughly frozen; a partially thawed bowl drastically impacts consistency․ For yogurt, higher fat content yields a thicker result․ Experiment with small adjustments to achieve the desired creamy texture!

Motor Issues and Safety Precautions

Should the motor struggle or stop, immediately unplug the machine․ Overloading the bowl with a very thick mixture is a common cause․ Allow the motor to cool down completely before attempting to restart․ Never immerse the motor housing in water!

Always ensure the unit is on a stable, level surface during operation․ Do not operate with a damaged cord or plug․ Keep hands and utensils away from moving parts while churning․ Prioritize safety – a malfunctioning unit should be professionally inspected before reuse․

Cleaning and Maintenance

Thoroughly clean all removable parts after each use with warm, soapy water․ Proper storage and preventative maintenance ensure longevity and optimal performance of your Cuisinart maker․

Proper Cleaning Procedures

After each use, immediately disassemble your Cuisinart machine․ Wash the freezing bowl, mixing blade, and lid with warm, soapy water․ Avoid abrasive cleaners, as they can damage the bowl’s non-stick coating․ The bowl must be completely dry before refreezing – moisture hinders performance․

The exterior of the machine can be wiped clean with a damp cloth․ Never immerse the motor base in water․ Ensure all parts are thoroughly rinsed and dried before reassembling․ Regular cleaning prevents buildup and maintains hygienic operation, guaranteeing delicious frozen desserts every time․ Dishwasher use is possible for some parts; consult your model’s manual․

Storage Instructions for Long-Term Use

For extended periods of non-use, ensure all Cuisinart components are completely clean and dry․ Store the freezing bowl in a freezer, even when not actively making frozen desserts, to maintain its chilling capacity․ Keep the motor base in a cool, dry place, away from direct sunlight and extreme temperatures․

Original packaging is ideal for storage, protecting the machine from dust and damage․ Avoid stacking heavy items on top․ Regularly check the bowl for any signs of moisture before use․ Proper storage preserves functionality and extends the lifespan of your Cuisinart ice cream maker․

Preventative Maintenance Tips

To ensure optimal performance, periodically inspect the Cuisinart machine for wear and tear․ Check the paddle for cracks or damage, and replace if necessary․ Always unplug the unit before cleaning or performing any maintenance․ Avoid using abrasive cleaners, as they can damage the surfaces․

Regularly wipe down the motor base with a damp cloth․ Ensure the freezing bowl is thoroughly dried before storing․ Following these simple steps will help maintain your Cuisinart maker’s efficiency and prolong its life, guaranteeing many batches of delicious frozen treats!

Advanced Techniques & Recipes

Explore custom flavors using fruit purees and extracts! Enhance creations with chocolate and nuts for exciting textures and tastes – unleash your inner chef!

Creating Custom Flavors

Unleash your creativity by experimenting with diverse flavor combinations! Don’t limit yourself to traditional recipes; the Cuisinart machine empowers you to personalize every batch․ Consider infusing your base with spices like cinnamon or cardamom for a warm, inviting twist․ Layering different fruit purees can create complex and refreshing sorbets․

For ice cream, think beyond vanilla – try coffee, lavender, or even savory herbs! Remember that alcohol can lower the freezing point, so use it sparingly․ Adjust sweetness levels to complement the chosen flavors․ Keep detailed notes of your experiments to replicate successful creations and refine future attempts․ The possibilities are truly endless!

Using Fruit Purees and Extracts

Elevate your frozen desserts with vibrant fruit purees and concentrated extracts! Purees, made from fresh or frozen fruit, deliver intense flavor and natural sweetness․ Ensure the puree is smooth to avoid icy textures․ Extracts, like vanilla or almond, provide potent flavor boosts – a little goes a long way!

When incorporating fruit, adjust the liquid content of your base recipe accordingly․ Extracts are best added towards the end of the churning process to preserve their aroma․ Experiment with combinations; raspberry puree with a hint of lemon extract is divine! Remember to balance sweetness and acidity for optimal taste․

Chocolate and Nut Add-Ins

Transform your frozen creations with decadent chocolate and crunchy nut inclusions! Mini chocolate chips, shaved chocolate, or cocoa nibs add rich flavor and texture․ For nuts, consider toasted pecans, walnuts, or almonds – toasting enhances their flavor․ Add these during the last few minutes of churning to prevent them from sinking․

Be mindful of the quantity; too many add-ins can disrupt the freezing process․ Roughly chop larger pieces for easier scooping․ A swirl of melted chocolate also creates a beautiful marbled effect․ Experiment with pairings – chocolate and peanut butter, hazelnut and dark chocolate – for unforgettable treats!

Safety Information

Always unplug the appliance before cleaning․ Never immerse the motor base in water․ Follow electrical safety guidelines to prevent shock and ensure safe operation․

Important Safety Precautions

Before operating your Cuisinart frozen dessert maker, carefully read all instructions․ To reduce the risk of fire, electric shock, or injury, always follow basic safety precautions․ Never operate the appliance with a damaged cord or plug․ Avoid using extension cords․ Ensure the machine is on a stable, level surface during operation․

Keep hands and utensils away from moving parts․ Do not attempt to disassemble the unit beyond the instructions provided․ Supervise children closely when the appliance is in use․ Never leave the machine unattended while operating․ Always unplug the appliance when not in use and before cleaning․

Electrical Safety Guidelines

To ensure safe operation, always connect the Cuisinart ice cream maker to a grounded electrical outlet with the correct voltage․ Never immerse the motor base, cord, or plug in water or other liquids․ Avoid operating the appliance with wet hands․ If the appliance malfunctions or shows signs of damage, disconnect it immediately and do not attempt repairs yourself․

Regularly inspect the power cord for any signs of damage․ Do not use the appliance if the cord is frayed or damaged․ Ensure the appliance is properly grounded to prevent electric shock․ Always unplug the unit before cleaning or performing maintenance․ Contact Cuisinart support for qualified repairs․

Warranty Information

Cuisinart typically offers a limited warranty on its frozen dessert makers, covering defects in materials and workmanship for a specified period, often one year from the date of purchase․ This warranty doesn’t cover damage resulting from misuse, accidents, or unauthorized repairs․ Proof of purchase is required for all warranty claims․

To initiate a claim, contact Cuisinart customer support․ They will guide you through the process, which may involve returning the appliance for inspection or repair․ The warranty provides options for repair or replacement at Cuisinart’s discretion․ See the official Cuisinart website for complete details․

Resources & Further Reading

Explore the Cuisinart official website for support and recipes․ Discover recipe books and online communities for inspiration, plus helpful FAQs!

Cuisinart Official Website & Support

For comprehensive assistance with your Cuisinart frozen dessert maker, the official Cuisinart website is an invaluable resource․ You’ll find detailed product manuals available for download, covering all models like the ICE-70, ICE-21, ICE-30BCU, and ICE60W․ These manuals provide crucial information on operation, safety, and maintenance․

Additionally, the website features a dedicated support section where you can access frequently asked questions (FAQs), troubleshooting guides, and contact information for customer service․ Should you encounter any issues, their support team can offer expert guidance․ Explore their recipe section for exciting new ideas to enhance your frozen treat creations!

Recipe Books and Online Communities

Expand your culinary horizons beyond the basic recipes with dedicated Cuisinart recipe books, such as “The Complete Cuisinart Homemade Frozen Yogurt, Sorbet, Gelato, Ice Cream Maker Book,” offering 100 decadent options for your 2-quart ICE-30BC model․

Furthermore, numerous online communities and forums are brimming with Cuisinart frozen dessert maker enthusiasts․ These platforms provide a space to share custom flavor combinations, troubleshooting tips, and innovative techniques․ Discover inspiration, ask questions, and connect with fellow dessert lovers to elevate your homemade frozen treat experience!

Frequently Asked Questions (FAQ)

Is your machine not freezing? Often, the simplest solution is ensuring the freezing bowl is thoroughly frozen for the required duration – typically 24 hours․ Mixture not thickening? Adjust ingredient ratios, ensuring sufficient fat content for optimal texture․

Experiencing motor issues? Always unplug the machine before inspection and refer to the safety precautions in the manual․ Remember, in 2018, the US produced 6․4 billion pounds of frozen treats! Explore online resources for further assistance and troubleshooting specific to your Cuisinart model․


manual del conductor de virginia

Category : Manuals

Virginia Driver’s Manual: A Comprehensive Guide

This guide prepares you to pass the Virginia DMV knowledge test‚ obtain a license‚ and drive safely; the July 1‚ 2025 edition is now available online!

Welcome to Virginia roads! Whether you’re a new resident or simply seeking to refresh your driving knowledge‚ understanding Virginia’s specific laws and regulations is crucial. You can legally drive with a valid driver’s license from India for up to six months.

However‚ for stays exceeding this period‚ obtaining a Virginia driver’s permit is mandatory. Experienced drivers‚ even with expired foreign licenses‚ can often proceed directly to the knowledge and nominal road tests.

Preparation is key! Study the official Virginia Driver’s Manual – the July 1‚ 2025 edition – to ensure you’re well-equipped for success and safe driving practices.

Legal Requirements for Foreign Drivers

Navigating Virginia’s roads as a foreign driver requires understanding specific legal stipulations. Individuals holding a valid driver’s license from another country‚ like India‚ are generally permitted to drive within Virginia for a period of up to six months from their date of entry.

Beyond this timeframe‚ obtaining a Virginia driver’s permit becomes a necessity. Even with an expired foreign license‚ experienced drivers can often bypass the learner permit stage and proceed directly to testing.

Remember to consult the latest Virginia Driver’s Manual for the most up-to-date regulations and requirements.

Driving with an International Driver’s License

An International Driving Permit (IDP) is often considered alongside a valid foreign driver’s license when operating a vehicle in Virginia. While not always explicitly mandated‚ possessing an IDP can significantly streamline the process‚ particularly when interacting with law enforcement.

However‚ it’s crucial to remember that an IDP is merely a translation of your existing license; it doesn’t grant independent driving privileges. Your home country’s license must always accompany the IDP and remain valid.

Always refer to the official Virginia Driver’s Manual for the most current and precise guidance regarding international driving permits.

Duration of Validity for Foreign Licenses

Virginia generally permits individuals holding valid driver’s licenses from other countries to operate vehicles within the state for a limited period. Current regulations‚ as of today’s date‚ allow driving with a foreign license for up to six months from the date of entry into the United States.

However‚ if your stay extends beyond this timeframe‚ obtaining a Virginia driver’s permit becomes mandatory. Experienced drivers‚ even with expired licenses from their home country‚ may be eligible to apply directly for a permit after passing the required knowledge and road tests.

Consult the Virginia DMV for precise details.

Obtaining a Virginia Driver’s Permit

Securing a Virginia driver’s permit is a crucial step for those intending to drive legally within the state‚ especially if residing for longer than six months or lacking a valid U.S. license. The process is accessible even with an expired foreign license‚ as demonstrated by experiences shared with the DMV.

Typically‚ applicants over 18 with driving experience can bypass the standard learner permit requirements. This involves passing a vision screening‚ the knowledge test based on the Virginia Driver’s Manual‚ and a nominal road test to assess basic driving skills.

Preparation is key; study the manual!

Eligibility Requirements for a Permit

To be eligible for a Virginia learner’s permit‚ applicants generally need to be at least 15 years and 6 months old to begin the learning process‚ though full permit eligibility often requires being 16 or older. While traditionally for new drivers under 18‚ experienced drivers over 18 can often directly apply‚ bypassing certain stages.

Having a valid form of identification is essential‚ alongside proof of legal presence in the United States. Successful completion of the vision screening and the DMV knowledge test‚ based on the Virginia Driver’s Manual‚ are also mandatory prerequisites.

Preparation is vital for success!

Required Documentation for Permit Application

Applying for a Virginia learner’s permit necessitates presenting specific documentation to the DMV. This includes proof of identity‚ such as a birth certificate or passport‚ and proof of legal presence in the United States. Social Security number verification is also typically required.

Applicants must provide proof of Virginia residency‚ like a utility bill or school enrollment record. If under 18‚ a completed learner’s permit application signed by a parent or guardian is essential. Remember to bring your completed application form and payment for the applicable fees!

The Virginia DMV Knowledge Test

The Virginia DMV knowledge test assesses your understanding of traffic laws‚ road signs‚ and safe driving practices. Thorough preparation is crucial for success; diligently study the official Virginia Driver’s Manual. This manual‚ updated as of July 1‚ 2025‚ is your primary resource.

Focus on understanding regulatory and warning signs‚ speed limits‚ and right-of-way rules. Practice tests are readily available online to familiarize yourself with the test format and identify areas needing improvement. Passing this test is a vital step towards obtaining your Virginia driver’s license!

Preparing for the Knowledge Test

Effective preparation for the Virginia DMV knowledge test centers around comprehensive study of the official Virginia Driver’s Manual. The July 1‚ 2025 edition incorporates recent updates and suggestions‚ making it essential to use the latest version.

Supplement manual study with practice tests; these simulate the actual test environment and pinpoint areas where further review is needed. Familiarize yourself with all road signs‚ traffic laws‚ and safe driving techniques. Dedicated study and practice will significantly increase your chances of passing on the first attempt!

Key Topics Covered in the Knowledge Test

The Virginia DMV knowledge test comprehensively assesses your understanding of crucial driving principles. Expect questions covering Virginia-specific traffic laws‚ speed limits‚ and right-of-way rules. A significant portion focuses on recognizing and interpreting various road signs – regulatory‚ warning‚ and guide signs.

Furthermore‚ the test evaluates your knowledge of safe driving practices‚ including defensive driving techniques and the dangers of distracted driving. Be prepared to demonstrate understanding of alcohol and drug-related driving laws‚ and proper vehicle operation procedures. Thorough preparation is key to success!

The Virginia Driver’s License Road Test

Successfully passing the Virginia DMV road test is the final step towards obtaining your driver’s license. Scheduling is essential‚ and appointments can be made through the DMV website. Ensure your vehicle meets all safety requirements – functioning lights‚ brakes‚ and proper documentation are crucial.

The examiner will assess your ability to safely operate a vehicle in real-world traffic conditions. Expect maneuvers like parallel parking‚ three-point turns‚ and obeying all traffic signals. A nominal road test is possible for experienced drivers‚ even with an expired foreign license.

Scheduling the Road Test

To schedule your Virginia DMV road test‚ appointments are required and can be conveniently made online through the official DMV website. Be prepared to provide your learner’s permit number and preferred dates/times. Availability can vary‚ so booking in advance is highly recommended.

Confirm all required documentation is readily available before your scheduled test. Arriving late or without proper paperwork may result in rescheduling. Remember‚ a successful road test demonstrates your ability to safely operate a vehicle and adhere to Virginia’s traffic laws‚ culminating in your driver’s license!

Vehicle Requirements for the Road Test

The vehicle you use for the Virginia DMV road test must be legally registered and insured‚ in safe operating condition‚ and have a valid inspection sticker. Ensure all lights – headlights‚ brake lights‚ turn signals – are functioning correctly. The examiner will verify these aspects before the test begins.

Furthermore‚ the vehicle must have a working parking brake and horn. Any mechanical issues discovered during the inspection may lead to immediate test failure. You are responsible for providing a vehicle that meets all requirements‚ ensuring a fair and safe evaluation of your driving skills.

Virginia Traffic Laws and Regulations

Virginia’s traffic laws prioritize safety and order on the roadways. Understanding speed limits is crucial; they vary by locality – rural areas‚ urban districts‚ and interstates have different posted limits. Right-of-way rules dictate who proceeds first at intersections‚ generally favoring pedestrians and vehicles already in the intersection.

Drivers must adhere to all traffic signals and pavement markings. Virginia enforces strict distracted driving laws‚ prohibiting handheld cell phone use while driving. Familiarizing yourself with these regulations‚ detailed in the driver’s manual‚ is essential for responsible driving and avoiding penalties.

Speed Limits in Virginia

Virginia’s speed limits are carefully defined based on road type and location. Generally‚ the maximum speed on most rural interstates is 70 mph‚ while urban interstates often have a 65 mph limit. On other highways‚ the maximum speed is typically 55 mph‚ though this can vary.

Within towns and cities‚ speed limits are usually 25 mph in business districts and 35 mph elsewhere‚ unless otherwise posted. Drivers must always observe posted speed limits‚ as these take precedence. Penalties for exceeding the speed limit can include fines and points on your driving record.

Right-of-Way Rules

Understanding right-of-way is crucial for safe driving in Virginia. Generally‚ yield to pedestrians and vehicles already in the intersection. When approaching a stop sign‚ the first vehicle to arrive has the right-of-way.

At uncontrolled intersections (no signs or signals)‚ yield to the vehicle on your right. When merging onto a highway‚ yield to traffic already on the highway. Emergency vehicles with sirens and lights activated always have the right-of-way. Always exercise caution and be prepared to yield‚ even when you believe you have the right-of-way.

Understanding Virginia Road Signs

Virginia utilizes three main types of road signs: regulatory‚ warning‚ and guide signs. Regulatory signs inform drivers of laws and regulations‚ like speed limits or no-turn zones – obedience is mandatory. Warning signs alert drivers to potential hazards ahead‚ such as curves‚ intersections‚ or pedestrian crossings; prepare to adjust your driving accordingly.

Guide signs provide information about routes‚ destinations‚ and points of interest. Familiarizing yourself with these signs‚ as detailed in the driver’s manual‚ is essential for navigating Virginia’s roadways safely and efficiently.

Regulatory Signs

Regulatory signs dictate what drivers must or must not do. These are often rectangular or square‚ frequently featuring black text on a white background. Examples include speed limit signs‚ stop signs‚ yield signs‚ and do-not-enter signs. Ignoring these signs is a violation of Virginia traffic law and can result in fines or penalties.

Understanding these signs is crucial for safe driving. The Virginia Driver’s Manual provides detailed explanations and illustrations of each regulatory sign‚ ensuring drivers are fully aware of their legal obligations on the road. Always prioritize compliance with regulatory signage.

Warning Signs

Warning signs alert drivers to potential hazards ahead‚ allowing time to adjust driving behavior. Typically diamond-shaped and yellow‚ they feature black symbols or text indicating the specific danger – curves‚ intersections‚ pedestrian crossings‚ or wildlife. These signs don’t prohibit actions‚ but advise caution.

The Virginia Driver’s Manual thoroughly details each warning sign‚ explaining the potential risks and recommended responses. Recognizing these signs is vital for proactive and safe driving. Pay close attention to warning signs and reduce speed or prepare to react accordingly to avoid accidents.

Safe Driving Practices in Virginia

Virginia prioritizes road safety‚ emphasizing both defensive driving techniques and strict laws against distracted driving. Defensive driving means anticipating potential hazards and reacting proactively to avoid collisions – maintaining a safe following distance‚ scanning the road‚ and being aware of surroundings.

The Virginia Driver’s Manual stresses the dangers of distracted driving‚ including texting‚ using a phone‚ or engaging in other activities that divert attention from the road. Virginia law prohibits handheld cell phone use while driving‚ promoting focused and responsible operation of vehicles for all motorists.

Defensive Driving Techniques

Mastering defensive driving is crucial for Virginia roads. This involves consistently scanning the road ahead‚ anticipating potential hazards‚ and maintaining ample following distance – at least three seconds – to react safely. Regularly check mirrors‚ be aware of blind spots‚ and signal intentions clearly.

The Virginia Driver’s Manual highlights the importance of adjusting driving to weather conditions‚ reducing speed during rain or snow‚ and increasing following distance. Expect the unexpected from other drivers and pedestrians‚ and always be prepared to yield the right-of-way‚ even when you have it legally.

Distracted Driving Laws

Virginia law strictly prohibits handheld cell phone use while driving‚ including texting. Hands-free devices are permitted for drivers 18 and older‚ but focus should remain on the road. The state emphasizes that any activity diverting attention – eating‚ adjusting the radio‚ or using navigation systems – constitutes distracted driving.

Violations carry significant penalties‚ including fines and points on your driving record. The Virginia Driver’s Manual stresses that distracted driving significantly increases crash risk. Prioritize safe driving by silencing devices‚ programming navigation before starting‚ and pulling over if needing to make a call or text.

The Updated 2025 Virginia Driver’s Manual

The July 1‚ 2025 edition of the Virginia Driver’s Manual is now accessible on the DMV’s website‚ incorporating valuable suggestions from recent reviews. This updated resource is crucial for anyone preparing for the knowledge test or seeking to refresh their understanding of Virginia traffic laws and regulations.

DMV leadership has been commended for integrating these improvements‚ ensuring the manual remains a comprehensive and reliable guide. Studying this manual is essential for obtaining a Virginia driver’s license and becoming a safe‚ responsible driver on the Commonwealth’s roadways. Access it online today!

Key Changes in the July 1‚ 2025 Edition

The latest edition reflects recent feedback and aims to clarify complex regulations for Virginia drivers. While specific details of the changes aren’t fully outlined in available information‚ the DMV actively solicited and incorporated recommended updates from external sources.

These revisions likely address evolving traffic patterns‚ new legislation‚ and best practices for road safety. Drivers are encouraged to thoroughly review the updated manual to ensure they are aware of any modifications to existing laws or procedures. Staying informed is key to responsible driving!

Accessing the Virginia Driver’s Manual Online

The July 1‚ 2025 edition of the Virginia Driver’s Manual is readily accessible on the Department of Motor Vehicles (DMV) website. This digital format offers convenient access for all prospective and current drivers in the Commonwealth.

Downloading the manual allows for offline study‚ ensuring you can prepare for the knowledge test and refresh your understanding of traffic laws anytime‚ anywhere. The DMV website provides a user-friendly interface for navigating and downloading the document‚ making it easy to become a safe and informed driver.